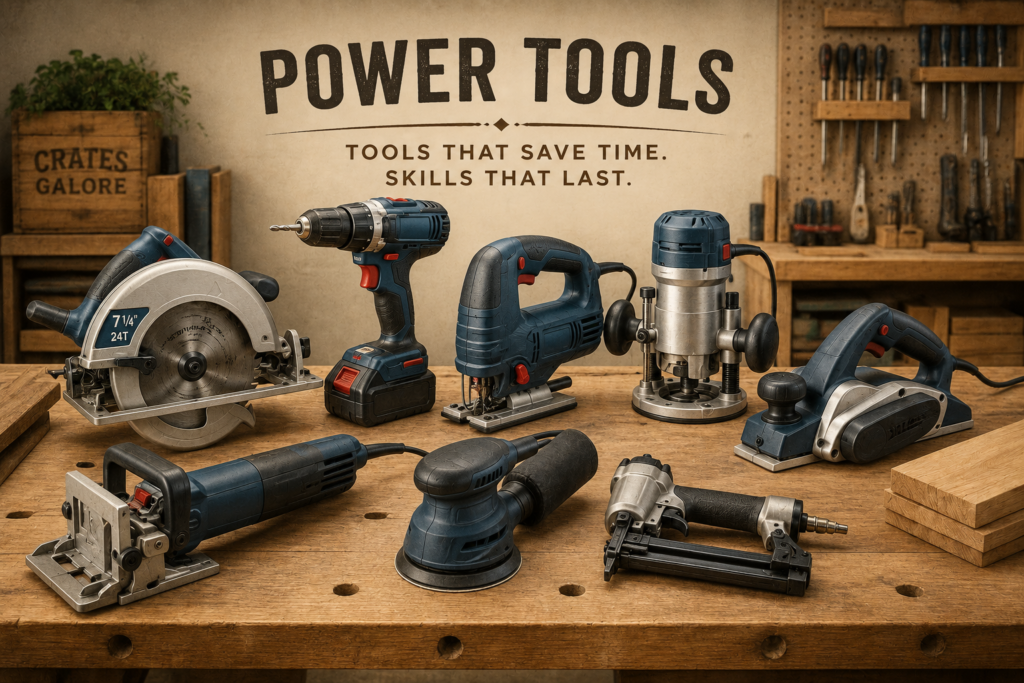
A good drill is useful. The right bit and the right technique make it much more useful.
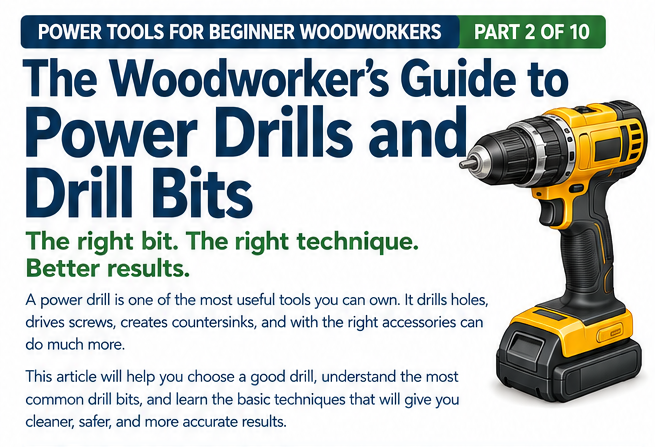
If you’re going to own just a few power tools for woodworking, a power drill should be near the top of the list.
A drill can make holes, drive screws, create countersinks, and—when fitted with the right accessory—handle a surprising variety of other jobs. It is one of those tools that earns its place in the workshop almost immediately.
But the drill itself is only half the story.
The bit you put into the chuck determines what the drill can do, and using the right technique determines whether the finished hole is clean and accurate or rough and ragged.
In this article, we’ll look at what to look for when choosing a drill, the most useful drill bits for woodworking, and a few simple techniques that will make your drilling safer and more successful.
Choosing a Power Drill
You don’t need the most powerful or expensive drill you can find.
Before you buy there is an important distinction you need to keep in mind. There is a difference between professional tools designed for heavy, continuous use and good-quality tools intended for the serious amateur, and for most beginning woodworkers, a well-made midrange drill is more than adequate.
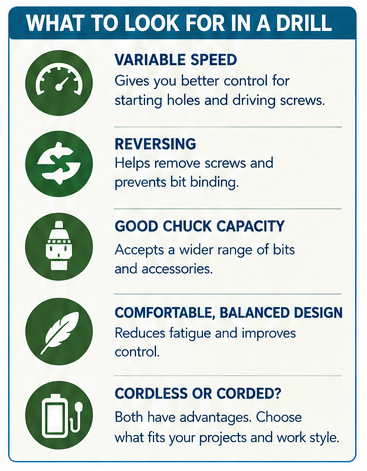
When comparing drills, concentrate on features that you’ll actually use.
Variable Speed
Variable-speed control gives you better command over the drill.
You can start slowly, establish the hole, and then increase the speed as appropriate. Lower speeds are also useful when driving screws and when working with larger bits.
Reversing
A reversing switch allows the drill to rotate in either direction.
This is useful when driving and removing screws, and it can also help when a bit becomes stuck.
Chuck Capacity
The chuck is the part of the drill that grips the bit.
Chuck capacity refers to the maximum shank size the chuck can accept. Common drills have chuck capacities in the approximate 1/4- to 1/2-inch range, depending on the model. Larger woodworking bits can often be used with reduced shanks that fit the drill’s chuck.
For a beginning woodworker, you don’t need to obsess over chuck capacity. A good general-purpose drill with a capable chuck will handle the ordinary bits you’re likely to use.
Corded or Cordless?
Both have advantages.
Cordless drills are convenient for small-bore drilling and screw driving, particularly when you need to move around the shop or work away from an outlet.
A corded drill provides continuous power making it a good choice when lots of drilling and screwing needs to be done.
There’s no reason your workshop can’t contain both.
Other Useful Features
Some drills include a secondary handle, which can provide additional control when using larger bits. Some also include depth stops or provisions for accessories.
You may also encounter drills with a hammer-action setting. This isn’t a woodworking function; it is intended for drilling masonry with the appropriate percussion bits. If you also expect to drill into brick, stone, or concrete, it can be a useful extra feature.
For woodworking, however, don’t let a long list of features distract you from the basics:
A comfortable, accurate, variable-speed drill with reversing capability is a very good place to start.
The Five Drill Bits Every Woodworker Should Know
Walk into a hardware store and you’ll find an intimidating selection of drill bits.
Fortunately, you don’t need all of them.
These five types will handle a large percentage of the drilling jobs you’ll encounter as a beginning woodworker.
1. Twist Bits
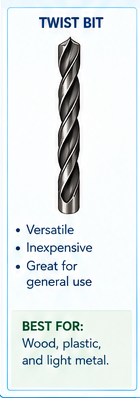
Twist drills were originally designed for metalworking, but they also make useful general-purpose wood-boring bits.
They’re inexpensive, versatile, and available in a wide range of sizes. High-speed-steel bits are particularly useful if you expect to drill both wood and metal.
One disadvantage is that a conventional twist bit isn’t particularly easy to center accurately in wood.
When precise positioning matters, mark the center of the hole carefully and use an awl or similar tool to start a pilot hole before drilling.
Keep the bits sharp, too. Wood dust can become packed into the flutes, so clean the bit before use.
Best for: General-purpose drilling.
2. Brad-Point Bits
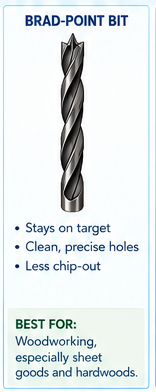
If you’re primarily drilling wood, brad-point bits are an excellent addition to your drill box.
A brad-point bit has a center point that helps keep the bit from wandering when you start the hole. Cutting spurs around the outside of the bit help produce a clean-edged hole.
That combination makes brad-point bits particularly useful when appearance matters.
Best for: Clean, accurately located holes in wood.
3. Spade Bits
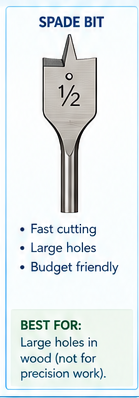
Spade bits are inexpensive and designed for drilling relatively large holes quickly.
Their long center point helps locate the bit at the center of the hole, even when drilling at a shallow angle to the surface. They are an economical choice for larger holes.
They aren’t the first choice when you need an exceptionally clean hole, but they’re extremely useful when speed matters more than finish quality.
Best for: Fast drilling of larger holes.
4. Forstner Bits
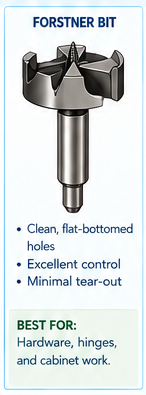
When you need a clean, flat-bottomed hole, reach for a Forstner bit.
Forstner bits produce exceptionally clean holes and have another useful advantage: they aren’t easily deflected by knots or changes in grain direction. They can also bore overlapping holes and holes that extend to the edge of a workpiece.
They’re particularly useful for cabinet hardware, hinges, and other applications where a precise hole is important.
Best for: Clean, flat-bottomed holes and precision work.
5. Countersink Bits
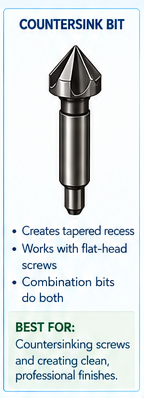
A countersink creates a tapered recess around a drilled hole so that the head of a countersunk screw can sit flush with—or slightly below—the surface of the wood.
Always drill pilot and clearance holes first so the point of the countersink is properly centered.
Combination drill-and-countersink bits can perform the drilling and countersinking operations together, which makes them particularly convenient for repetitive screw fastening.
Best for: Preparing holes for flat-head screws.
Don’t Forget the Other Drill Accessories
The five bits above are enough to get most beginners started, but there are many other useful accessories.
Drill-and-counterbore bits, for example, create a larger recess around the screw so the head can be hidden beneath a wooden plug. Plug cutters can then produce matching wooden plugs from scrap or matching stock.
You can also find masonry bits, percussion bits, hole saws, and numerous specialty accessories.
The important thing is not to buy them all at once.
Buy specialized bits when a project gives you a reason to use them.
Learn the Parts of a Drill Bit
Knowing a little bit about how a drill bit works will help you choose and use one correctly.
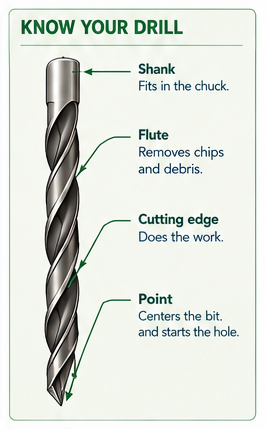
Shank
The shank is the part held by the drill’s chuck.
Flutes
The spiral grooves running along the bit help remove chips and debris from the hole.
Cutting Edges
These are the surfaces that actually cut the wood.
Point
The point establishes the location of the hole and starts the cutting action.
Understanding these basic parts also makes it easier to recognize why different bit designs behave differently.
A brad-point bit, for example, adds a center point and cutting spurs specifically to improve positioning and produce a cleaner hole.
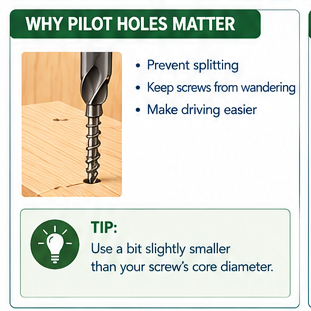
Why Pilot Holes Matter
Driving a screw directly into wood isn’t always the best approach.
A pilot hole gives the screw a prepared path and can make fastening easier and more controlled.
Pilot holes are especially useful when working near the end of a board or with hardwoods, where forcing a screw directly into the material can contribute to splitting.
The exact pilot-hole size depends on the screw and the wood you’re working with, so when in doubt, test the combination on scrap.
The goal is not to make the hole as large as possible.
The goal is to give the screw a useful starting path while leaving enough wood for the threads to grip.
When You Need a Drill Press
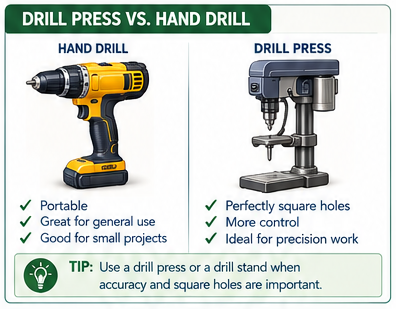
A handheld drill is wonderfully versatile, but it has one significant limitation.
It’s difficult to hold it perfectly square to the workpiece.
For ordinary drilling, that’s often not important. But when a hole must be accurately positioned and square to the face of the work, a drill press provides much greater control.
If you don’t have a drill press, a vertical drill stand can turn a portable drill into a useful stationary drilling machine.
A sturdy stand with a rigid column and a secure clamp for the drill is essential.
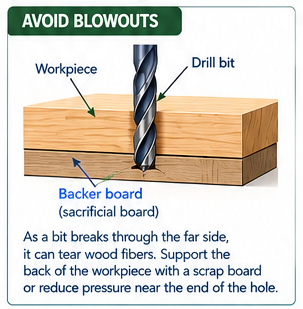
When drilling completely through a workpiece, support the underside with a piece of scrap board to help prevent splintering.
Driving Screws With a Drill
Your drill isn’t just a hole-making machine.
For many beginning woodworkers, driving screws will become one of its most common jobs.
A few simple habits make a big difference.
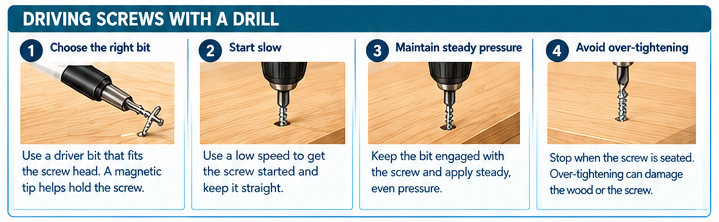
1. Choose the Correct Driver Bit
Use a bit that fits the screw head properly.
A poorly fitting driver bit is more likely to slip out and damage the screw or the surrounding wood.
2. Start Slowly
Begin at low speed.
This gives you time to get the bit properly seated and keeps the screw from wandering.
3. Keep Steady Pressure
Keep the driver bit engaged with the screw head and apply steady pressure.
Don’t try to force the screw into the wood by pushing harder and harder.
4. Stop When the Screw Is Seated
Overdriving a screw can damage both the screw and the wood.
If the screw needs to sit below the surface, use a properly prepared countersink or counterbore rather than simply driving the screw deeper.
Keep Your Drill Bits Sharp and Clean
A drill bit doesn’t have to be visibly damaged to perform poorly.
A dull bit cuts less efficiently and can require excessive pressure.
Wood dust can also become packed into the flutes of twist drills, reducing their ability to clear chips from the hole. Clean any debris before use.
Make a habit of inspecting your bits before putting them into the drill.
If a bit is damaged, replace it rather than trying to force it through the work.
A Few Simple Drill Safety Rules
A power drill may seem harmless compared with a table saw or router, but it is still a power tool and should be treated accordingly.
The general safety rules for general woodworking material apply:
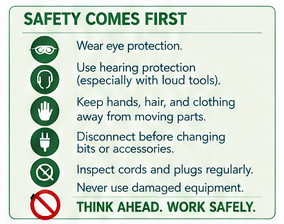
- Wear eye protection when drilling.
- Keep loose clothing and jewelry away from moving parts.
- Tie back long hair.
- Secure the workpiece rather than trying to hold it in your hand.
- Keep the drill’s handles clean and dry.
- Inspect cords and plugs for damage.
- Disconnect the drill before changing bits or accessories.
- Don’t carry the tool by its cord.
- Don’t use power tools in wet or very damp conditions.
Most importantly, think about where the drill bit will go before you start drilling.
Make sure the area beneath the work is clear, the workpiece is supported, and your hands are nowhere near the path of the bit.
Building Your Drill-and-Bit Collection
You don’t need a huge collection of bits when you’re starting out.
A useful beginning set might include:
- a set of twist bits;
- a set of brad-point bits;
- a few spade bits;
- several Forstner bits;
- a couple of countersink or combination drill-and-countersink bits;
- and a selection of driver bits for the screws you commonly use.
Add specialty bits as your projects demand them.
That’s a better approach than buying an enormous assortment of accessories that may spend years sitting unused in a drawer.
The Right Bit Makes the Job Easier
One of the first lessons you’ll learn as a woodworker is that the tool itself isn’t always the answer.
Sometimes the answer is the right accessory.
A twist bit may be perfectly adequate for a general-purpose hole. A brad-point bit may give you a cleaner result. A Forstner bit may be exactly what you need for a hinge. A countersink bit may turn an ordinary screw hole into a professional-looking detail.
Learn what each bit is designed to do, and you’ll spend less time fighting your tools and more time making good work.
A power drill is one of the simplest tools in the workshop.
Learning to use it well is one of the most useful skills a beginning woodworker can develop.
The right bit. The right technique. Better results.
What’s Next?
In the next article, we’ll move from drilling to cutting and take a close look at the jigsaw—one of the most versatile power saws for the beginning woodworker and especially useful for curves, openings, and irregular shapes.