Welcome To Part 11 Of Our Series: BUILT BY HAND: A BEGINNERS GUIDE TO HAND TOOLS
GoTo Part 12

No woodworker ever complains about having too many clamps. It’s one of those universal truths of the craft — you always need one more than you have. But you don’t need a large collection to get started. A few well-chosen clamps will handle most glue-up situations, and you can add to them as specific needs arise.
What Clamps Actually Do
Clamps apply the pressure needed to hold joints tight while glue sets. Good woodworking glue bonds wood to wood extremely well, but it needs contact and pressure during the cure period — typically 30 minutes to an hour for initial set, with full strength reached after 24 hours.
Clamps also serve as extra hands during assembly, holding parts in position while you check alignment, drive fasteners, or add other components. In complex assemblies, having enough clamps to handle the job without rushing is essential.
Bar Clamps and Pipe Clamps
For gluing up frames, carcasses, and panels, bar clamps or pipe clamps are the standard tool. These have a fixed jaw at one end and a sliding tail stop that locks anywhere along the bar to accommodate different sizes of work.
Bar clamps in the 24 to 36 inch range are the most versatile for furniture work. Pipe clamps — where you supply your own lengths of threaded pipe — are a cost-effective alternative that lets you make clamps in any length you need.
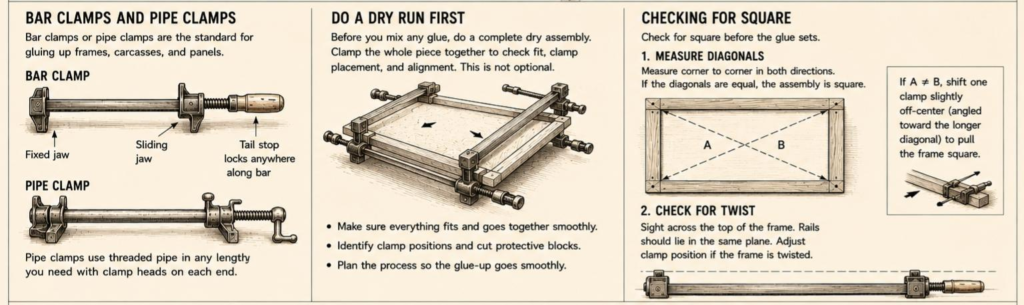
When clamping, always protect the wood surface from the metal jaws with scrap wood blocks. Not only does this prevent denting, it also distributes the clamping pressure more evenly across the joint.
Doing a Dry Run First
Before you mix any glue, always do a complete dry assembly — clamping the whole piece together without glue to make sure everything fits and you have the right clamps in the right positions. This is not optional. Glue starts working immediately, and discovering a joint problem or a missing clamp after the glue is applied is a stressful situation.
During the dry run, check that the assembly goes together smoothly, identify where your clamps will be placed, and cut any protective blocks you’ll need. Run through the process mentally so the actual glue-up feels routine.
Checking for Square
Once a frame or carcase is clamped, check it for square before the glue sets. The most reliable method is to measure both diagonals — corner to corner in both directions. If the diagonals are equal, the assembly is square. If not, adjust by shifting one clamp slightly off-center (angled toward the longer diagonal); this pulls the frame toward square.
Also check that the assembly isn’t twisted. Sight across the top of a frame to see if the rails lie in the same plane. If the frame is twisted, adjust clamp position until it lies flat.
C-Clamps and Fast-Action Clamps
C-clamps (also called G-clamps) are the smaller, versatile members of the family. They’re used for clamping small assemblies, holding work to the bench, and providing extra pressure in tight spots. A few medium-sized C-clamps — say, 4 to 6 inch capacity — are useful on any project.
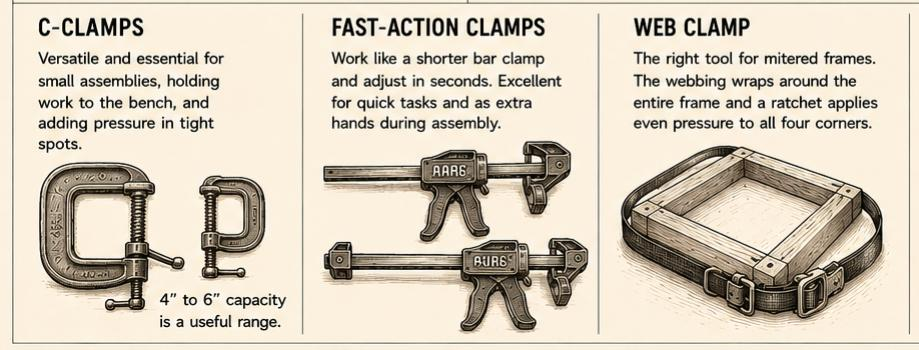
Fast-action clamps work like a shorter version of a bar clamp but can be adjusted and tightened in seconds. They’re excellent for quick tasks and as extra hands during assembly. They lack the length of bar clamps but are more nimble and faster to deploy.
Web Clamps
For mitered frames — picture frames, cabinet face frames with angled corners — a web clamp is the right tool. It consists of a length of nylon webbing that wraps around the entire frame and tightens with a ratchet mechanism, applying even pressure to all four corners simultaneously. It’s the only practical way to clamp a mitered frame without specialized equipment.
Building Your Collection
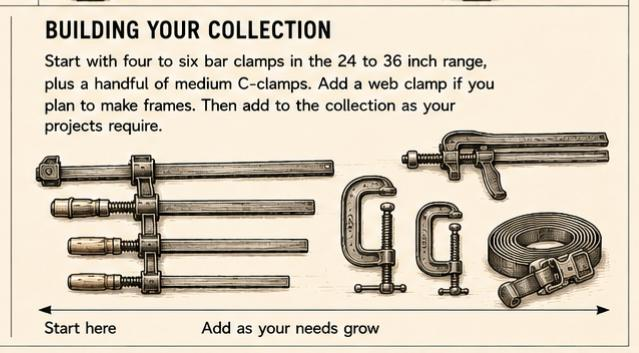
Start with four to six bar clamps in the 24 to 36 inch range, plus a handful of medium C-clamps. Add a web clamp if you plan to make frames. After that, add to the collection as specific projects require — longer clamps for bigger work, more bar clamps when you find yourself running out during a glue-up.
Don’t worry about having a perfect collection before you start. Every project teaches you something about what you need, and the collection builds naturally over time.