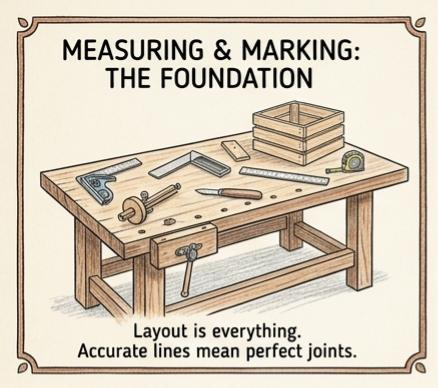
Measuring and Marking — Getting It Right Before You Cut
Welcome to part 3 of our series: “Built by Hand: A Beginner’s Guide to Hand Tools”
Here’s a rule that experienced woodworkers learn the hard way: mistakes happen at the marking stage, not the cutting stage. If your layout is off, your joints won’t fit no matter how well you cut them. Getting accurate with measuring and marking tools is the foundation everything else builds on.
The good news is that the tools involved are simple and inexpensive. Here’s what you need and how to use them.
The Combination Square
A combination square is the most versatile measuring and marking tool you’ll own. It combines a ruler with an adjustable head that locks at 90 degrees or 45 degrees, and it works as a depth gauge, a marking guide, and a straightedge all in one.
The 6-inch size is the most useful for joinery work. Larger sizes are available for checking bigger surfaces, but the small one fits in your apron pocket and handles most tasks you’ll encounter.
To use it for marking, lock the head at the measurement you need, hold the head firmly against the edge of your workpiece, and run a pencil or marking knife along the blade. You get a consistent, repeatable line every time.

The Try Square
A try square has a fixed blade at exactly 90 degrees to its stock, making it ideal for checking corners and marking lines across the face of a board. Unlike a combination square, it doesn’t adjust — that’s also what makes it reliable for checking whether your work is truly square.
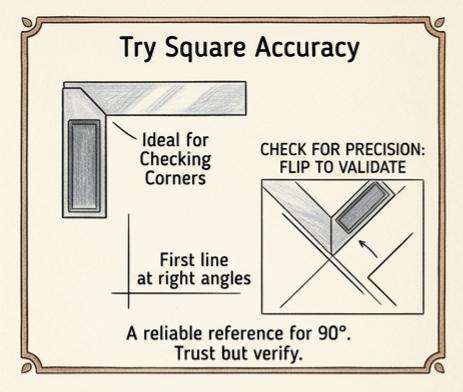
To check a try square for accuracy, draw a line at right angles to a surface, then flip the square over and align it with the same line. If the edge of the blade matches the line exactly, the square is accurate. If not, don’t trust it for precision work.
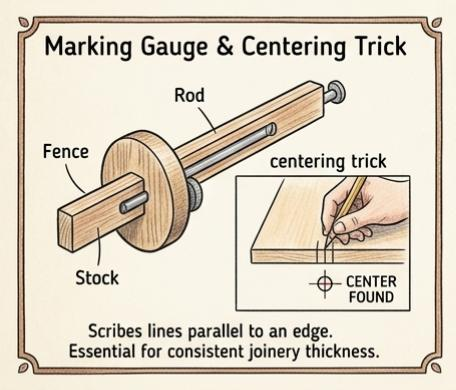
The Marking Gauge
A marking gauge scribes a line parallel to an edge. It has a fence (called the stock) that rides against the edge of your board, and a pin or blade that scores the wood at a set distance from that edge.
You’ll use this constantly: marking tenon thickness, setting out mortise positions, scribing dovetail baselines. A good marking gauge keeps your measurements consistent across multiple pieces, which is essential for furniture joinery.
To set it, adjust the stock to your measurement using a ruler, lock it down, then check it by making a test mark on scrap wood. For finding the exact center of a board, set the gauge to approximately half the thickness, mark from one face, then mark from the other. If the two marks coincide, you’ve found center.
The Marking Knife
A pencil is fine for rough layouts, but for joinery lines — the lines you’ll actually cut to — use a marking knife. A knife severs the wood fibers rather than just bruising them, which gives you a cleaner, more precise line and a reference groove that your saw or chisel can register against.
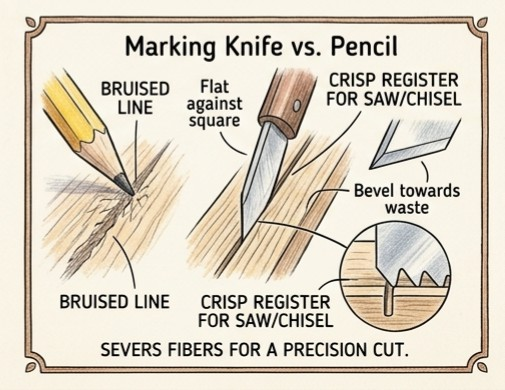
The blade should be beveled on one side only. Run the flat face against your square or straightedge; the bevel goes toward the waste side of your line. This keeps the cut right where you want it.
Tape Measure and Rulers
A standard retractable tape measure handles rough measurements — cutting boards to approximate length, measuring room for a piece of furniture, and so on. For precise work at the bench, a steel ruler is more reliable. A 12-inch steel ruler is a good addition to your kit.
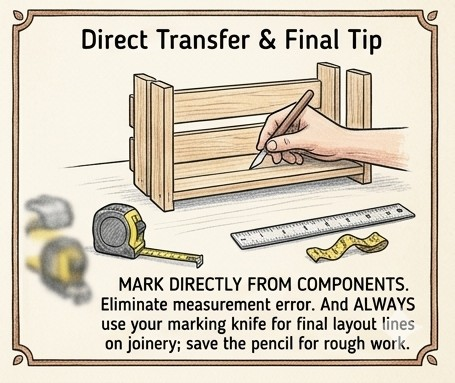
One important note: whenever you can, mark directly from one component to another rather than measuring both with a tape. If you’re fitting a shelf between two uprights, hold the shelf blank between the uprights and mark its length directly. This eliminates the chance of misreading a tape measurement.
Practical Tips
Keep your measuring tools clean and stored carefully. A bent tape measure or a dinged square edge will give you bad measurements without announcing itself. Check your squares occasionally for accuracy — they can drift, especially wooden ones in a damp shop. And always use your marking knife for final layout lines on joinery; save the pencil for the rough work.