
Part 4 of of our 5 part series: Measuring, Marking & Layout for Beginner Woodworkers
If measuring is about finding a dimension and marking is about placing it on the wood, layout tools are the secret sauce that makes that process repeatable, reliable, and—most importantly—calm.
Good layout tools reduce your reliance on constantly reading a ruler. Instead, they let you carry distances, lock angles, and reference faces. This is the real secret to accurate woodworking: working directly from the wood itself, not a list of numbers.
Why Layout Tools Matter
Beginners often rely heavily on tape measures and rulers. The problem isn’t the tools—it’s that reading numbers introduces all sorts of errors:
- Parallax error: Reading the ruler from an angle.
- Cumulative mistakes: Small errors that add up.
- Inconsistent reference points: Starting your measurement from a different spot each time.
Layout tools eliminate much of this by letting you set a dimension once and then transfer it directly to your wood.
1. The Square: Your Most Important Layout Tool
A square is the foundation of accurate woodworking. You’ll use it constantly.
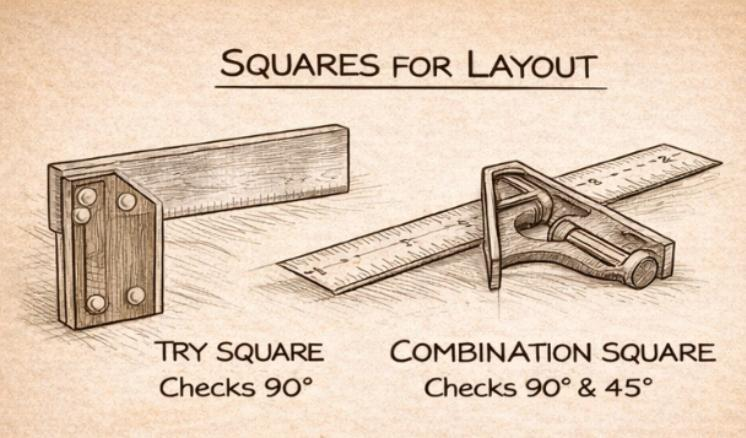
Try Square: A try square has a fixed 90° angle. It’s perfect for checking if board ends are square and for marking crosscuts and joinery shoulders.
Combination Square: A combination square is more versatile, allowing you to mark both 90° and 45° angles. It can also be used to measure depth. For many beginners, this is the most useful square to own.
Always register the square against a known reference face or edge. If you don’t know which face is your reference, accuracy is impossible.
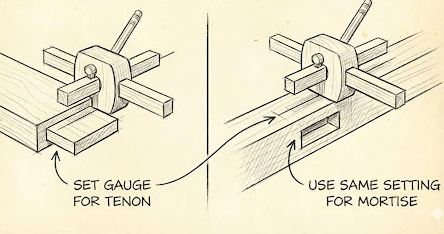
2. Marking Gauges: Precision Without Measuring
A marking gauge is one of the most powerful tools for consistent layout. It sets a fixed distance from an edge and transfers it perfectly along a board.
No numbers to misread.
Perfectly parallel lines.
Repeatable layout.
You set the gauge once using a ruler or by referencing another part, then use it everywhere that dimension is needed. Wheel-style gauges are especially friendly for beginners and produce clean, controlled lines.
3. Bevel Gauges: Capturing Angles
A bevel gauge (also called a sliding T-bevel) doesn’t measure angles—it captures them. You can use it to:
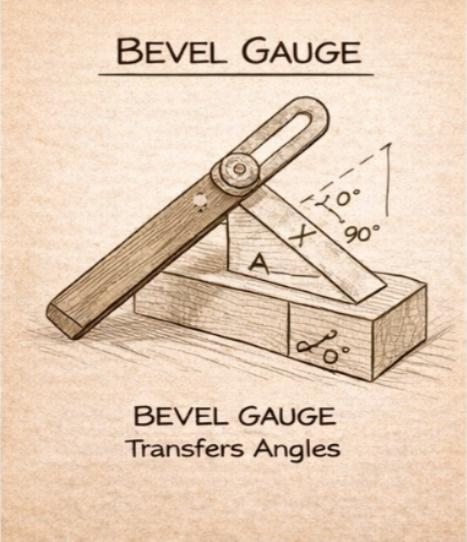
Transfer angles from drawings or existing parts.
Lay out miters and tapers.
Repeat non-standard angles.
Once locked, a bevel gauge preserves the angle until you intentionally change it. This is a huge time-saver and accuracy-booster when working with angles other than 90°.
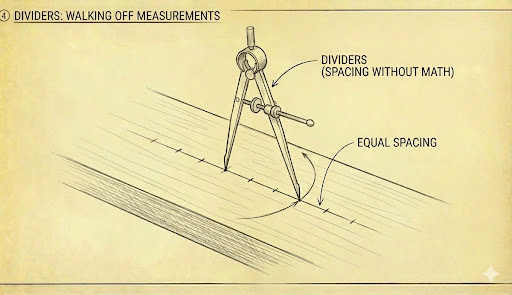
4. Dividers: Spacing Without Math
Dividers are one of the most overlooked layout tools—and one of the most powerful. They excel at:
Dividing a length into equal parts.
Transferring distances.
Laying out proportional spacing.
Dividers let you “walk” a measurement across a board without calculating fractions. It’s a simple, elegant way to get perfect spacing every time.
A Simple Layout Workflow
Remember, layout tools only work when you use them consistently from the same reference. Before you start marking:
- Choose one face as the reference face.
- Choose one edge as the reference edge.
- Mark them lightly.
- Set your gauges and squares once.
- Mark all related parts together.
This prevents errors from thickness variation or imperfect milling and turns layout into a deliberate, controlled step.
Coming Next
In Post 5, we’ll bring everything together with layout strategies for common woodworking tasks, including cutting boards to length, basic joinery, panel layout, and avoiding cumulative errors.