Introduction: Why Have a Home Workshop?

Imagine having your own dedicated space where you can build almost anything—a sturdy bookshelf, a custom guitar stand, or maybe even a new piece of furniture. That’s the power of having a home woodworking workshop. This isn’t just a place to store tools; it’s a creative sanctuary where raw materials become finished projects.
Why bother setting up a shop? First, it gives you a safe, organized area to work whenever inspiration strikes. Second, and maybe most importantly, it keeps the mess out of the rest of the house! Woodworking creates sawdust, paint fumes, and noise, and a dedicated shop keeps all of that contained. Finally, when you have the right tools laid out properly, your projects will turn out better and faster. Organization leads to efficiency!
In this article, we’ll walk through the steps of creating a great workshop, even if you’re starting small. We’ll cover choosing the best spot, planning the layout, picking essential tools and storage, and, most importantly, learning how to stay safe and keep things clean.
Choosing the Right Space
The first step in building your workshop is picking the right location. You don’t need a massive building, but you do need enough room to move around and handle long pieces of wood safely.
Separate is Best
The best workshops are slightly away from your living space — like in a shed, garage, or barn. This keeps the noise, dust, and paint fumes from drifting into your home. It also gives you freedom to work late without disturbing anyone.
If you’re moving in heavy machines or stacks of lumber, a ground-floor workshop is a must. Carrying a table saw down a flight of stairs isn’t anyone’s idea of fun!
1. The Garage Shop
The garage is a popular choice for a home workshop, and for good reason. It usually has big doors that make it easy to get long pieces of wood in and out. Garages often have high ceilings, which is great for storing tall items or if you get bigger machines. They also tend to have good natural airflow, which helps with ventilation.
The main drawback: You might have to share the space with cars, bikes, and all sorts of other outdoor gear. If that’s the case, a great solution is to put your bigger, heavier tools on casters. That way, you can roll them out of the way when you need to park a car or get something else out.
2. The Basement Shop
Many people set up their workshops in the basement. It’s usually a good spot because it’s separated from the main living areas of the house. This helps keep noise and dust contained. The important systems for your house, like water heaters and electrical panels, are often in the basement, which can sometimes make it easier to add plumbing or electrical outlets for your shop.
The main drawbacks: Basements often have lower ceilings, which can be tricky if you’re working with tall pieces of wood or have larger machines. They also usually have very little natural light, and sometimes they can feel damp or have poor air circulation. You might need to add special lights and think about how to control moisture in the air.
If you can dedicate a separate structure to your shop, you’ll have the best control over noise and dust. The noise from a table saw won’t bother anyone indoors. The main trade-off is that you might need to install extra electricity and heat.

Important Factors to Consider
No matter where you set up, here are the non-negotiable things you must plan for:
Space: You must have enough space to handle big boards. A sheet of plywood is 4 feet by 8 feet. If you can’t turn that sheet around or feed it through a saw easily, your work will be much harder and more dangerous. Look up your main machines and find out how much space they need around them. However, if space is really tight, think about ways to take a machine outside or using a hand held power tool for rough cutting large boards and panels to a manageable size.

Access: Can you get your lumber and finished projects in and out of the space without twisting or scraping them? Wide doors are always better.
Power: Woodworking machines like saws and planers use a lot of power. You need to install enough outlets—and make sure they are on different circuits—to handle the load. Never use extension cords as a permanent solution for major tools.
Light: You need light everywhere to work safely and accurately. Combine natural light from windows with artificial light. Use bright “daylight” bulbs or fluorescent tubes overhead to reduce shadows, and use task lighting (like a flexible lamp) directly over your main workbench.
Climate Control: Wood and tools like consistent temperatures. Heating your shop in the winter keeps your hands warm and prevents wood from cracking. Good ventilation in the summer is essential to remove hot air and any fumes from finishes or glues.
Planning Your Workshop Layout
Once you have your space, the real fun begins: planning the layout. Don’t skip this step! A good plan, drawn out on paper, will save you hours of frustrating work later.
Layout for Working Smart
Every workshop needs an efficient flow — a way to move smoothly from one tool or task to another.
Feed Path is Key: This is a really important: for some tools, especially big ones like a table saw, you need a long, clear path before and after the machine. Imagine trying to push a full-sized sheet of plywood (which is 4 feet wide and 8 feet long!) through a saw. You need enough room for that whole sheet to move freely without bumping into walls or other tools. This open space is called the feed path, and it’s important for safety and for getting good results.

Center Layout (for larger shops): Place big tools like the table saw or jointer in the middle so you can feed long boards from either side.

Wall Layout (for smaller shops): Line up machines along the wall to save space. Keep your workbench near a window for natural light.
Start with a Plan
Measure and Draw: Measure the room’s walls, doors, and windows, and draw a floor plan on graph paper.
Test Placement: Cut out paper shapes that represent the footprint of your largest tools (like the table saw and workbench). Move these cutouts around on your floor plan to see what fits best.
Prioritize Safety: As you place machines, imagine running a long board through them. Does the board hit a wall or another tool? You must have clear space on both the infeed and outfeed sides of machines like a table saw or miter saw.
Work Zones
The best workshops are divided into clear areas, or work zones, based on the type of activity happening there:
Workbench Area: This is your primary spot for hand tool work. It needs to be strong, sturdy, and well-lit. This is where you measure, cut small pieces, chisel, and assemble smaller items.
Machine Area: This zone holds your stationary power tools like the table saw, drill press, or jointer. It needs the best access to power and dust collection.
Assembly Area: This needs to be the largest, clearest open space. You need room to clamp pieces together, apply glue, and use sandpaper. You can often use your table saw or other large, flat machine tops for assembly, as long as you keep them clean.
Storage Area: Dedicate wall space f/or lumber racks, tool cabinets, and shelving for hardware and supplies.
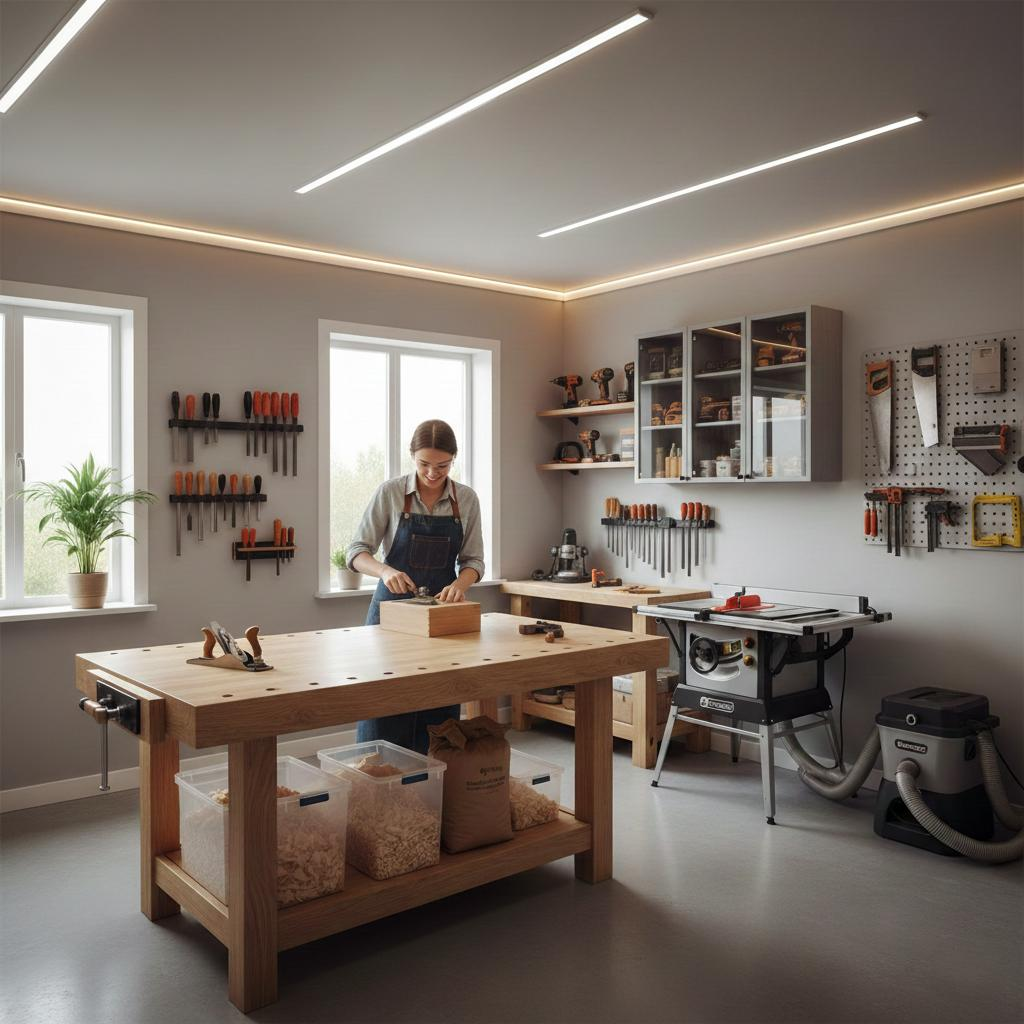
Yesss, But…
All of this about Feed Paths and Work Zones is all well and good, but most newcomers to woodworking are usually stuck with very limited space and not many options to expand. So don’t worry too much about setting up a shop that looks like the one in the pictures. To solve the problem, first think about what you see yourself building and what tools you’ll need at an absolute minimum. Based on that, you can think about benches, stands and cabinets that can accommodate those things you’ll be regularly using. Think cabinets that double as stands and stands and benches that can accommodate more than one tool. Then put everything on wheels. Good casters and Mobile Bases will let you push everything into a corner and let you roll out only what you need into the center of the room or driveway.
Tools, Storage, and Dust Control
What goes into your shop is just as important as the layout. You can start simple, but every shop needs these key items
Essential Tools
You’ll need two main types of tools:
Power Tools: An electric drill is essential for almost every project. A jigsaw is great for cutting curves. For most woodworking, a table saw is the central machine, allowing you to cut boards to precise widths and lengths. If space is tight, look for a universal machine that combines several functions (saw, planer, jointer) into one unit.
Hand Tools: These are the basics, and they include hammers, chisels for fine tuning, hand saws, measuring tapes, and, most importantly, clamps. Clamps hold your work steady for cutting, gluing, and finishing. And just remember, Nobody, Anywhere Ever said “I have too many clamps”
Smart Storage Ideas
A messy shop is an inefficient shop. The number one rule for storage is simple: Everything must have a home.
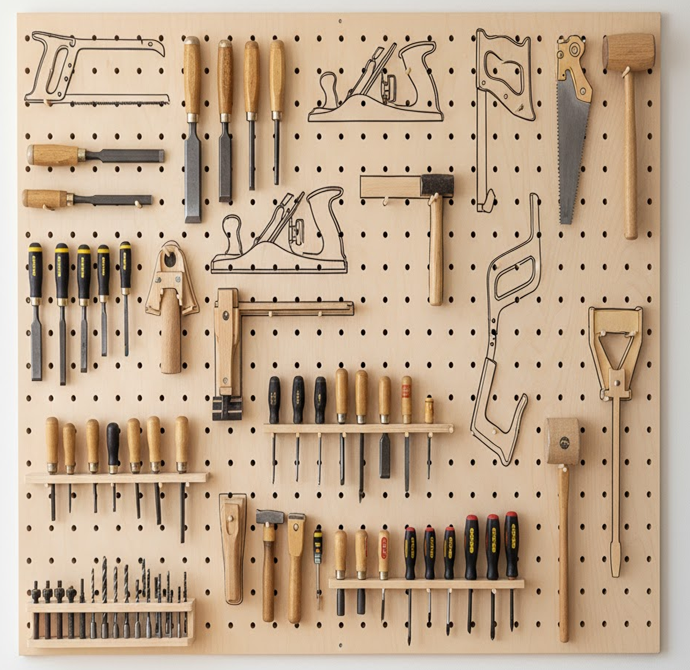
Tool Racks: Get as many tools off your workbench as possible. Hanging frequently used tools—like screwdrivers, hammers, chisels, hand saws and measuring tapes—on a pegboard right next to your bench saves tons of time.
Board Storage: Lumber needs a clean, dry place to live. Stand long boards on edge in a rack along a wall, or use vertical storage racks. Keep Sheet goods on edge between a wall and a partition or cabinet. Always keep useful scrap bins for small wood offcuts but be ruthless about throwing out clutter—you don’t need a scrap bin the size of a car
Cupboards and Drawers: Keep things that need protection, like sharp plane blades and expensive power tools, secured in drawers or cabinets.
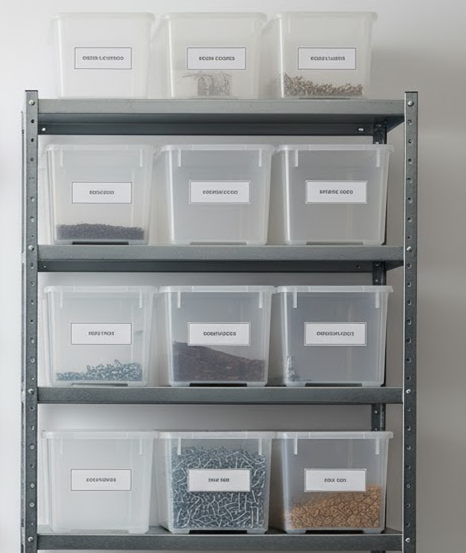
Small Parts: Use clear plastic bins or narrow shelves with divided sections for screws, nails, small hardware, and drill bits. Label everything! This is one of the fastest ways to improve efficiency.
Dust Collection and Cleanliness
Possibly the most important aspect of your shop. I call it a tossup between this and adequate lighting as to which is more critical. Sawdust is a constant presence and every time you work in the shop you generate more. Plan now on how to mitigate it

Why Saw Dust is Dangerous
Fire Hazard: Piles of sawdust on the floor can easily catch fire. Very fine dust floating in the air can even cause an explosion under the right conditions!
Health Hazard: Breathing in sawdust is bad for your lungs. Over time, it can cause serious health problems.
Ruins Projects: If you’re trying to paint or varnish a project, dust floating around will settle on it and ruin the smooth finish.
Simple Dust Solutions: Even for a small shop, you need a way to deal with dust. Use a portable dust collector with flexible hoses that can be attached directly to your power tools (like the table saw and sander). A heavy-duty shop vacuum can double as a very efficient dust collector
Ventilation: Use fans to move air out of the room when you are sanding or finishing. This is critical for getting rid of fine dust and strong chemical fumes.

Keep it Clean
Fire Safety: Keep oily rags (used for stain or finish) in metal containers with tight-fitting lids. Empty your dust bags and shop vac frequently. Always have a smoke alarm and a visible, easily reachable fire extinguisher in the shop.
Even with a great dust collection system, you still need to regularly clean your workshop. Dispose of dust and shavings often to prevent them from piling up and becoming a fire hazard.
Controlling Temperature and Air
Wood is a natural material, and it reacts to the air around it.That’s why controlling the temperature and humidity in your workshop is so important.
A. Climate Control
If your workshop gets super cold in winter or blazing hot in summer, it’s not just uncomfortable for you—it’s also not great for your wood or tools. Installing heating (and maybe even air conditioning) helps keep the temperature constant. This makes your shop a nicer place to work all year round.
B. Humidity Control
Humidity is the amount of moisture in the air. If the air is too damp or too dry, wood can warp, crack, or swell up. Keeping the humidity at a steady level helps your wood stay flat and stable, making your projects turn out much better.
C. Ventilation Fan
When you’re painting, staining, or using certain glues, they can give off strong, sometimes harmful, fumes. That’s why you need a ventilation fan to pull those unpleasant smells and chemicals out of your workshop and bring in fresh air. It’s another important way to protect your health.
Light and Power
Imagine trying to cut a straight line or see tiny details in a dimly lit room. It would be hard and dangerous! Good lighting is absolutely essential for doing careful, accurate, and safe woodworking.
A. Good Lighting is Safe Lighting
You need to see clearly to avoid mistakes and accidents. Adequate light helps you work comfortably and precisely.
B. Walls and Ceiling
A simple trick to make your workshop brighter: paint the walls and ceiling white or a very light color. These colors reflect light much better than dark colors, making your whole workspace feel brighter and more open.
C. Artificial Light
“Daylight” Bulbs: When you buy light bulbs, look for ones labeled “daylight.” These bulbs give off a light that’s very similar to natural sunlight, which is great for accurately matching wood colors and stains.
Fluorescent Lights: The best way to get bright, even light in a workshop is to install fluorescent light fixtures spread out across the ceiling. This helps create shadow-free illumination, meaning there aren’t dark spots where you’re trying to work.
Safety Note: Here’s an important safety tip: Fluorescent lights can sometimes make fast-moving machine parts look like they are standing still, especially when a machine is slowing down after being turned off. Always remember that a machine might still be moving, even if it looks still! Always wait for blades to completely stop before touching them.
D. Natural Light
If you have windows in your workshop, that’s fantastic! Natural light is wonderful to work by. Ideally, natural light should come from the north, as this provides a more consistent, soft light throughout the day. But don’t worry too much if your windows aren’t facing north – any natural light is a bonus!
Powering Your Tools
Woodworking often involves power tools, so you need a good electrical setup.
A. Plenty of Outlets
It’s really annoying and unsafe to have extension cords snaking all over your workshop. The best solution is to install plenty of electrical outlets along your walls, especially behind your workbench. This way, you can plug in your tools directly and keep cords out of the way.
B. Extension Cord Safety (The Amperage Check)
Sometimes, you just can’t avoid using an extension cord. When you do, it’s super important to use the right kind of cord. Extension cords come in different gauges. A lower gauge number means a thicker cord, and a thicker cord can handle more electricity.
If you use a cord that’s too thin for your tool, it can overheat, damage your tool, and even start a fire. Every tool has an amperage rating (how much power it uses). You need an extension cord that can handle that amperage for its length. Here’s a quick guide:
| Cord Length | Gauge | Maximum Amps |
| 25 ft. | 18 | 10 |
| 25 ft. | 16 | 13 |
| 25 ft. | 14 | 15 |
| 50 ft. | 18 | 5 |
| 50 ft. | 16 | 10 |
| 50 ft. | 14 | 15 |
| 75 ft. | 18 | 5 |
| 75 ft. | 16 | 10 |
| 75 ft. | 14 | 15 |
| 100 ft. | 16 | 5 |
| 100 ft. | 12 | 15 |
| 125 ft. | 16 | 5 |
| 125 ft. | 12 | 15 |
| 150 ft. | 16 | 5 |
| 150 ft. | 12 | 13 |
Safety and Comfort in the Workshop
Safety is the first rule of woodworking. If you only remember one thing from this article, let it be this: woodworking is fun, but wood and machines don’t care about your fingers.
Personal Protection Gear (PPE)
You must wear the right gear every single time you turn on a machine.

Face Shields: For work that creates a lot of flying debris, like wood turning or chipping, wear a full face shield over your safety glasses for total protection.
Safety Glasses or Goggles: This is mandatory. Protect your eyes from flying sawdust, splinters, and wood chips. You should wear these the moment you step into the shop.
Ear Protection: Power tools are loud! Exposure to loud noises can damage your hearing permanently. Use earmuffs or earplugs whenever you’re using noisy tools like a table saw or planer.
Face Masks or Respirators: Whenever you are sanding or applying a spray finish, wear a high-quality respirator to protect your lungs from fine dust and chemical fumes.
Safe Work Habits
Good habits keep you safe and your projects on track:
Keep Walkways Clear: Untidy cords are trip hazards. Always keep cords neat and secured out of your path. A fall in the workshop can easily lead to a serious accident involving a running tool.
One Major Tool at a Time: Don’t run your dust collector, your air compressor, and your table saw all at once. Overloading one electrical circuit can cause a fire.
Unplug Before Adjusting: Always disconnect the power to any tool before you change a blade, switch a drill bit, or make any internal adjustment. This single habit prevents most serious workshop accidents.
Wear Proper Clothing: No loose sleeves, no dangly jewelry, and no strings. If clothing gets caught in a moving blade or bit, it will pull your hand or arm in instantly.
Comfort and Maintenance
Your workshop should be a place you enjoy being in.
Rubber Mats: Standing on a concrete floor for hours can hurt your knees and back. Use thick rubber mats in front of your workbench and your main machines for comfort.
Regular Review: Review your layout every few months. Are you always walking around the same machine? Is the storage working for you? Your workshop should evolve as your skills and projects change.
Making the Workshop Your Own
Every workshop is unique. It reflects the type of projects you build, the space you have available, and the skills you want to develop. The important thing is to start simple. You don’t need every tool on the market right away; you can buy or upgrade tools as your skills and project needs grow.
Focus on the three core principles we’ve covered: organization, safety, and flexibility. By carefully planning your layout, implementing smart storage solutions, and making safety gear a mandatory part of your routine, even a small garage or shed can become a well-equipped, efficient woodworking shop. This is a place that will inspire your creativity for years to come.